Hello everybody, it is Brad, welcome to my recipe site. Today, we’re going to prepare a special dish, authentic russian piroshki. One of my favorites food recipes. For mine, I am going to make it a bit unique. This is gonna smell and look delicious.
Authentic Russian Piroshki is one of the most favored of recent trending meals on earth. It is enjoyed by millions every day. It’s easy, it is fast, it tastes delicious. They’re nice and they look wonderful. Authentic Russian Piroshki is something that I’ve loved my whole life.
Stir in sugar and sprinkle yeast over the top. Pour the remaining milk into a large bowl. Stir in sugar and sprinkle yeast over the top. Pour the remaining milk into a large bowl.
To get started with this recipe, we must first prepare a few components. You can have authentic russian piroshki using 24 ingredients and 7 steps. Here is how you can achieve that.
The ingredients needed to make Authentic Russian Piroshki:
- Get Bread dough
- Get 300 grams Bread flour
- Take 1 tsp Quick-rising dry yeast (one that does not need proofing)
- Take 200 ml Milk
- Prepare 20 grams Butter
- Get 1 tbsp Sugar
- Prepare 1 tsp Salt
- Prepare 1/2 Beaten egg
- Get Filling (stir-fried cabbage)
- Prepare 2 leaves Cabbage
- Take 1/4 Onion
- Make ready 1/8 Carrot
- Take 1 Salt, pepper
- Make ready Filling (ground beef and rice)
- Make ready 100 grams Ground beef
- Make ready 1 scoop with a rice spatula Hot cooked rice
- Take 1/4 Onion
- Take 1 Nutmeg, salt, pepper
- Take To finish:
- Get 1/2 Beaten egg
- Get Filling (stir-fried mushrooms)
- Take 2 packs altogether 4 kinds of mushrooms (any kind)
- Get 1 tbsp Mayonnaise
- Prepare 1 Salt, pepper
Most piroshki are made with a soft yeasted dough that is enriched with egg, but some piroshki are made with a pastry dough of butter/margarine that becomes flaky when baked. Question by kelly: Authentic Russian piroshki recipe? I need a authentic Russian piroshki recipe. I need the dough recipe and a variety of filling recipes (for example apple, meat with onion and cabbage, mashed potato…).
Steps to make Authentic Russian Piroshki:
- Bread dough: Heat up the milk until it is warm to the touch. Bring the butter to room temperature. Put all the bread dough ingredients except for the butter in a bowl. Mix all these ingredients together first.
- Now add the butter and knead for about 10 minutes by hand. Roll into a ball, and place in the bowl. Cover with plastic wrap, and a wrung out kitchen towel. Leave it in a warm place, and let it proof for 1 hour.
- Filling: Mince the vegetables and mushrooms. Stir-fry separately for each filling. Season a little bit saltier than normal.
- When the bread dough rises, divide into 16 even pieces, and roll into balls. Cover with the plastic wrap and wrung out kitchen towel. Let it rest for 15 minutes.
- Roll out the dough with a rolling pin. Place the filling on top, and tightly wrap it up. It's useful to make little tweaks to the each of the wrappers so that you know which filling is inside.
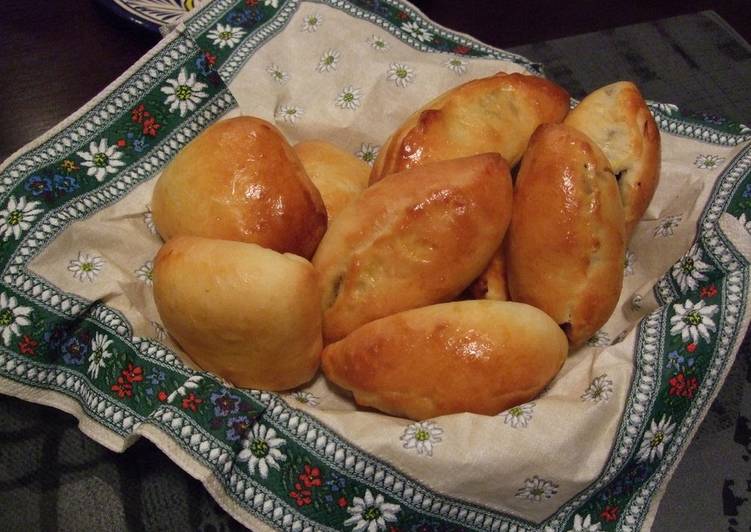
- Arrange on a baking sheet lined with parchment paper. Brush with the beaten egg, and bake in the preheated oven for 14-16 minutes at 200℃.
- When they become golden brown, they're done! Enjoy these piroshki while they're still hot!
I need a authentic Russian piroshki recipe. I need the dough recipe and a variety of filling recipes (for example apple, meat with onion and cabbage, mashed potato…). Please list dough and instructions first, then the fillings and instructions, and cooking instructions. Piroshki (pronounced PIR-oh-sch-KI) means 'little pirog' or 'little pie'. A Russian pirog (pie) can have a sweet or savory fillings.
So that’s going to wrap this up for this special food authentic russian piroshki recipe. Thanks so much for your time. I am sure you will make this at home. There’s gonna be interesting food at home recipes coming up. Don’t forget to save this page on your browser, and share it to your loved ones, friends and colleague. Thanks again for reading. Go on get cooking!